I am the first of my hometown buddies to buy a Silhouette. A few people own a Cricut, but I get questions about the Silhouette all the time. What is it? How is it different? Do you like it? What exactly does it do?
I thought it might be fun to take pictures of a print and cut session to show people an example of what the Silhouette does and looks like. As many of you know, I am throwing my soon to be 3 year old an airplane party. He walks around the house talking about airplanes all the time. He is just a teensy bit excited!
I wanted to print and cut the "in flight" lunch box labels for the party, so I am designing, printing and cutting those today. Join me! You do not have to print designs for the Silhouette to cut. You can just cut out shapes/outlines/letters, etc. (no printer involved), which is the first task I learned on the Silhouette. You simply take the downloaded shape on your computer, size it the way you want, send it to the Silhouette, and it cuts the shape. You can cut paper, cardstock, vinyl, fabric and more.
I have made vinyl letters for signs and paper letters for banners. I have cut out shapes for Christmas decor. I have cut out tags and various shapes for present cards, party tags, etc. It is my favorite crafting tool.
I bought these DARLING aqua polka dot boxes from Polka Dot Market to hold each lunch for the party. We are doing a vintage airplane feel for the party, so the "boxed" in-flight lunch was a cute play on that. I will make little sandwiches, have a bag of chips and add clear cups of fruit. My colors are aqua and orange--so fun!
First, I open the Silhouette program on my computer. Here I have my computer plugged into the Silhouette. There are no cartridges to buy for the Silhouette. Every cut, design, and project comes from your computer.
I had made some circular tags, but I am not over the moon about them. I will create some new ones for this tutorial.
I first copy my downloaded "ticket" shape (I used these for the invites) onto my blank computer page and "ungroup" the shape.
I remove the airplane shape and delete the rest. I can resize the airplane to fit into an outer label shape.
I pick a classic, scalloped square shape to be the outline of my labels.
Cute!
At first I did everything in black because I was going to print the design on orange paper. I did a print and didn't love it on the orange.
I decided to do orange fill paint in each shape and print it on white cardstock. (Sorry, I didn't take a picture of this, but just click on the shape you want to fill (select it) and then click on the paint can at the top. Pick your color and you're done!).
On the Silhouette, you need to make sure you check the box "show the registration marks" to print. This will help the machine to accurately cut the design you are printing. Here is the screen BEFORE I checked the box.
I also took the one shape I designed and just hit "duplicate" until I filled my page.
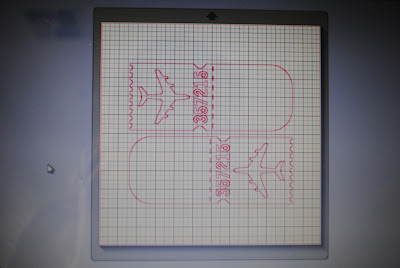
When you choose how the machine will cut your design, you want to select the inside shapes (ungroup the entire design and select each part). Check "no cut" under the cutting style window. Then just the outside label will be cut from the printed sheet. The dark pink line is where the machine will cut.
I printed the sheet on my printer. The scalloped lines are light since they will be cut.
I put it into my Silhouette and had it read the registration marks. It got to work and cut out the labels.
I took each label and some teal ribbon I bought at Costco for the spring season. I wrapped the ribbon around the box and then added my label.
Perfect! They are a cross between a suitcase and a boxed lunch--just the look I wanted.
Since I broke down all the steps, it sounds much more complicated than it actually is. It just takes a few hours of playing with the Silhouette program to grasp how to use the different functions, and they have a great tech support you can call for help.
I'll show you more projects as I prepare for the party. I still have so much to do, but I'm having so much fun!


How cute! I noticed you use a Windows 7 laptop. Does the Silhouette work with a MAC?
ReplyDeleteIt does, Sandra! It was first made for PCs, but if you look up the details on their website, you can get more info. You'd love it!
DeleteI found a neat Silhouette blog @ http://blog.silhouetteamerica.com/. I thought you'd like to check it out.
ReplyDeleteI love the blog too! I also follow the Facebook page so I get ideas from the blog as it gets updated. : )
ReplyDelete