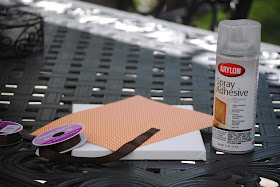
Since I just received my Silhouette Cameo and I needed to create a new thankfulness activity for our family, I got out a spare canvas, some extra fall scrapbooking papers, and I got to work!
First, I sprayed adhesive on my canvas and cut a piece of scrapbook paper to lay on top.
I designed the Give Thanks! lettering and then added 1 Thessalonians 5:18 on my Silhouette software.
I hooked my computer up to the Silhouette cutting machine.
Here is the Cameo. I love it!
I hot glued 4 pieces of brown ribbon to the bottom, back of the canvas so that each of our family members could clip thankful leaves onto the ribbons.
I made leaves on the Silhouette and cut out 10 per person in our family.
My little Destructo holds up my sign so far . . . I just used clothespins to pin on thankful leaves.
I glued on my Silhouette letters and some ric rac as a border.
I pinned the leaves onto the ribbon--ready for our "thankful for" notes.
Ready to go!
My first thankful note is that I'm thankful for Fall Fest--our church's Harvest Carnival. It was a fun night!
Here is a close up of the papers I used for the leaves.
Enjoy! Whether you make a thankful tree or thankfulness ribbon hanger, make sure you practice thankfulness this November!
I linked this to:


so pretty!
ReplyDeletevery nice!
ReplyDeleteThanks so much for letting me link this post up at Tip Junkie!
ReplyDeleteYou can see it here http://www.tipjunkie.com/15-terrific-thanksgiving-papercraft-tutorials-paper-crafts/
Lowri
very cute!
ReplyDelete